Wednesday, November 4, 2015

How to Make "Real" Sauerkraut

 Fresh, Homemade Sauerkraut Can't be Beat!

Dirk Ingo Franke


If you've never had fresh, homemade sauerkraut, than you're missing out on a crunchy, tasty treat! Homemade sauerkraut is easy to make and takes about two weeks to naturally ferment - this means you don't need to add vinegar- which makes it "real" sauerkraut.

Sauerkraut Ingredients:

  • 1 Large Head of Cabbage; Firm, fresh heads are the best to use
  • 1 Tablespoon Crushed Sea Salt

Here's What You'll Need

  1. Food Processor; You can always shred the cabbage by hand using a knife
  2. Large Bowl or Sanitized Bucket (1-5 Gallons depending on how much sauerkraut you make)
  3. Cutting Board
  4. Sharp Knife
  5. Measuring Spoons
  6. Dinner Plate
  7. Potato Masher (Optional)
  8. Plastic Gallon Jug or Mason Jar filled with tap water
  9. Clean Kitchen Towel

How to Make Sauerkraut

Step 1: Remove outer leaves of the cabbage - especially those that are bruised or damaged.

Step 2: Quarter the cabbage by cutting it in half and cutting each half in half; remove the core.
- If using a food processor to shred your cabbage, cut each quarter in half as well.

Step 3: Feed each piece of cabbage into the food processor - make sure you use the blade for shredding. If using a knife, thinly shred each quarter of cabbage.

Step 4: Place half of the cabbage into your bowl or bucket, sprinkle with half a tablespoon of crushed sea salt; mix and squeeze cabbage for about 2-3 minutes working the water out. (This is where the potato masher comes in but I found it easier to use my hands.) The salt will help to draw the water out of the cabbage which is needed for the brine.

Step 5: Add remaining half of cabbage to bowl or bucket and sprinkle with remaining half a tablespoon of salt - repeat the squeezing and mixing process.

Step 6: Press the cabbage mixture into the bottom of your bowl using your hands or the masher. At this point, there should be enough liquid in the bowl to cover the cabbage. To test, place the dinner plate over the cabbage and lightly press down. If liquid seeps over the rim of the plate, then you are all set. (You can always add some water, a little at a time, if need be to cover the rim of the plate.

Step 7: Place the dinner plate face-down on top of the cabbage. Place the gallon jug on top of the plate, making sure liquid seeps over the rim. Rinse a clean kitchen towel under hot water, squeeze out access water, and cover the bowl with the towel.

Notes of Interest

  • The cabbage should always be submerged in liquid. As the fermenting process begins and continues over a 2 week period, more and more liquid will be drawn from the cabbage.
  • Check your cabbage every day. A white filmy muck may form on the top of the cabbage - this is normal! Simply skim the white muck off the cabbage and cover with a clean dinner plate. Don't forget to place the gallon jug on the plate and cover with a clean, warm towel.
  • Go ahead and taste the sauerkraut after 3 or 4 days - it should be turning sour by then. Check your sauerkraut each day and skim away the muck for 2 weeks or until the sauerkraut has the taste you prefer.

How to Save Your Sauerkraut for Later Use

Gandydancer
  • If you're not going to be eating your sauerkraut right away after the fermenting process is finished, go ahead and can or freeze your homemade sauerkraut. 
  • I find it easier to freeze; I simply portion the sauerkraut into freezer bags, measuring 2 cups at a time ensuring there is an equal amount of brine in each bag. Then I label, date, and freeze. ( I say 2 cups because I had an abundance of cabbage in the garden this year and fermented 5 heads of cabbage at one time).
  • To can, bring the brine and sauerkraut to a boil in a large sauce pan. Fill mason jars with sauerkraut and top with brine leaving 1/8" of head space. Top with a fresh lid making sure the lids are tightly sealed.

Helpful Links:


Tuesday, February 3, 2015

Kale and Kielbasa Soup Recipe


Image: Chrlstle 


Quick and easy to make, this tasty kale and kielbasa soup will give your taste buds something to talk about! This soup is full of flavor and tickles the senses while simmering on the stove.


Serving Size: 6 - 10          


Ingredients 

1 lb. Kielbasa cut into slices
2 Medium Yellow Onions, chopped
2 Carrots, sliced
5 Cups Kale, ribs removed and ripped into bite-sized pieces
2 Cans (28 oz.) Cannelloni Beans, drained
2 teaspoons Minced Garlic
7 Cups Chicken Stock
3 Tablespoons Olive Oil
1 teaspoon Kosher Salt
¼ teaspoon Ground Black Pepper
1 Bay Leaf

Directions 

1. In medium pot, sauté kielbasa till slightly browned (about 5 minutes), remove & set aside
2. Add olive oil and sauté onions & carrots for 5 minutes. Add garlic & sauté 1 minute. Turn heat to low & add kale. Cover and let steam until wilted (about 4 minutes). Add Salt & pepper, stir.
3. Add broth, beans, kielbasa, & bay leaf
4. Turn heat to high & bring to a boil. Cover & let simmer on low about 20 minutes stirring occasionally 

Monday, February 2, 2015

Croc Pot Beef-n-Veggie Soup

Beef-n-Veggie Soup

Image: calamity_hane


Warm up your insides on a cold winter day with this healthy, filling beef-n-veggie soup. Packed full of flavor and filled with vitamins, this soup is sure to please the entire family. It's great re-heated and freezes well too - that's if you have any leftovers!


Serving Size 8 - 10


Ingredients 

2 lbs. Stew Beef, cut into chunks
2 Carrots, sliced
2 Cups potatoes, diced
1 Onion, chopped
3 Small Bunches of Kale, ripped into bite-sized pieces
½ teaspoon Salt
½ teaspoon Pepper
1 ½ Cartons Beef Stalk (use 1 carton if you prefer less broth)

Directions 


1. Season beef with salt & pepper to taste and lightly brown in sauté pan
2. Add carrots, potatoes, and onion to croc pot (save kale for later)
3. Add beef and salt & pepper, cover with broth
4. Cook on low for 6 hours stirring occasionally
5. Add kale and cook for an additional hour

Would you prefer toasted garlic bread or warm, hearty rolls with your Beef-n-Veggie Soup?


Wednesday, January 29, 2014

Hops: To Eat or Not to Eat

Image: Wikimedia Commons

Are Hops Safe to Eat?

Hops are an increasingly popular vine that many home gardeners are establishing in their gardens, whether it's to make a home brew or provide a unique source of shade in the yard. Are these edible flowers more versatile than we think, and are they really safe to eat?

Medicinal Value of Hops

According to WebMD.com, hops are a useful component in treating many medical disorders. Some of the more recognizable disorders include:

  • ADHD
  • Anxiety
  • Bladder Infections
  • Cramps
  • Indegestion
  • Insomnia
  • Nerve Pain
  • Tension
  • Various Cancers


*Of course, with any treatment, a doctor should always be consulted first.

When Not to Eat Hops

While hops may be beneficial to some, not everyone should eat them because more research needs to be done to ensure their safety during different situations. Do not eat hops during the following:

  • Pregnancy
  • Breastfeeding
  • Depression
  • 2 Weeks before Surgery

Wednesday, January 22, 2014

Are Deicers Harmful to Your Garden?

Gibby's Garden
Can the deicer that keeps your walks and stairs safe to tread on be harmful to your garden? To put it simply, yes. Man-made deicers are made with chemicals responsible for melting ice, but when these chemicals seep into the ground, our garden plants can be damaged from root to tip. So, what makes these deicers harmful to our gardens, and how can we prevent our prized plants from becoming stunted and sickly looking?

3 Potentially Harmful Chemicals in Deicers

Without getting all scientific, there are three chemicals in deicers that can be potentially harmful to your plants. These include sodium chloride, better known as salt, urea and potassium chloride. While all three work wonders for melting ice, when used in excess plant damage can occur.


  • Sodium Chloride: When sodium chloride leaches into garden beds, soil can become contaminated and entire plants from the roots up can be damaged.
  • Urea: Being a fertilizer, urea can be harmful to more than just plants. When too much is used, ground water, soil and plants can all be effected.  
  • Potassium Chloride: Keep an eye on your plants, especially larger ones that peak through the snow as this chemical can be harmful to both foliage and plant roots. 

How to Prevent Plant Damage

The good news is, you can still deice your walks and stairs without worrying too much about the harmful effects on your plants.


  • Moderation: Don't overdo it with the deicer, only use it when you need to.
  • Spring Clean Up: Sweep and hose down walks and stairs come spring. Your plants and the soil surrounding where you've deiced all winter will benefit from a cleansing soak as well. 
  • Mulch: Surround your plants and garden soil with a protective layer of mulch in the fall to help keep chemicals from leaching into the soil and damaging plant roots.
  • Cover Plants: Some bushes and shrubs can be covered during the winter. This will help protect foliage from being damaged.
  • Natural Deicers: You can always switch to a natural deicer. Keep in mind that these are harder to find and more expensive. 

Next time you head out to deice, be mindful of how much deicer you are using. With a little moderation and preparation, you can keep your walks and stairs safe to use without your plants taking the brunt of a chemical assault.

Have you tried a natural deicer? Are they worth paying a little extra for?

Source: Patton, D. Ice melts help but can be harmful.Retrieved from http://www.johnson.ksu.edu/p.aspx?tabid=597

Wednesday, January 15, 2014

3 Must Try Vegetables for 2014

Gibby's Garden
With the start of the new year and all the rain we've been getting here in Maine, I couldn't help but dig out my seed catalogs and start making a list of all the vegetables I want to plant come spring. Of course I have my normal must-haves like cukes and tomatoes, but I've also added a few vegetables I'd love to try but have never grown before.

With that being said, isn't time we all start to garden outside of the box and add some tasty adventures to our garden plots and boxes? Now, I'm not talking about some foreign vegetable that only Andrew Zimmern would dare to eat or one you can't pronounce. I'm talking about the veggies we see in our local produce departments that spark our interest and get our taste buds talking.

My 3 Must-Try Vegetables


Kale


I don't know about you, but I watch lots of cooking shows on TV, and I keep seeing kale starring as the main attraction. Kale is a great vegetable to grow here in the north because it's cold tolerant and the flavor only intensifies with a good frost. Kale loves fertile, highly organic, well-draining soil and grows best when watered consistently. 

When it comes time to harvest, begin clipping individual leaves after about 2 months time and continue clipping until a heavy frost kills the plants off. Once in the kitchen, have fun incorporating this tasty leafy green into your favorite dishes including chips, soups, pasta and more. 

If the thought of making your own crunchy chips and fresh pesto isn't enough, think about your waist line. Kale is packed with Vitamins A & C and is low in saturated fat and cholesterol, making this a must-try for 
those of us looking to eat a little healthier this year.

Leeks

Pauk/Wikimedia Commons


Leeks are nothing new; in fact, you've probably walked right by them in the produce section, perhaps not even knowing what they were. They have long greens stemming from white bottoms, which as you probably guessed, are the edible part. To me, leeks taste like a very mild onion and make for a great potato and leek soup, one of my favorite winter dishes. 

Due to the different varieties available, leeks can be grown successfully in hot and cold climates. Here in the north, it's important to grow a variety that is suitable to colder climates such as Lexton or Bandit. Both tolerate frost very well and can be planted in succession, meaning you can have multiple harvests over an extended period, even after the frost has killed off the rest of the garden.

Keep in mind, the more cold tolerant the leek, the longer it takes to mature - but trust me, it is well worth the wait.  Harvest baby leeks for a tender, sweeter taste and mature leeks, which may take 110-120 days to mature depending on the variety, for full flavor. 

Plant these toned-down onion cousins in fertile, well-draining soil in a sunny location in the garden. Now, without scaring you off from growing this must-try vegetable, you need to know that leeks must be blanched. All this means is that the stems need to be hidden from the sun in order to turn white. This can easily be done by planting leeks in trenches, and if need be, by piling soil over the stems should they peek from below ground.

Edamame

Tammy Green/Wikimedia Commons


Are you a fan of green peas and Lima beans? If yes, then edamame is a must-try in 2014. Grown in well-draining, moderately fertile soil, these soybeans, a staple in Japanese cuisine, are known for their flavor and nutrients.  Pop a handful into your mouth to enjoy a fresh, crunchy snack or steam as a tasty side to your favorite lean cut of meat.

A little sweeter than some peas, edamame is packed with nutrients like protein, amino acids, calcium, fiber and more. If you're pregnant or breastfeeding, edamame is a great source of folic acid. Edamame is also a great source of energy, so make sure to add it to your list of power-packed vegetables to try.

For us gardeners in the north, it's important to choose an early variety of edamame in order to enjoy it's full bounty. So, opt for a variety that takes about 90 days or less to mature. Butterbeans is a great variety that is sure to produce a heavy yield great for freezing, canning or eating fresh. Remember to pick these tasty vegetables when the seeds swell and before the pods turn yellow.

I don't know about you, but I cannot wait to get outdoors and work up a sweat in the garden. I know I still have a few more months before the Maine weather will allow me to do this, but I can dream can't I? Until the snow melts, the frost makes its way out of the ground and the blessed spring sun warms our gardens, I'll be busy making my lists of vegetables to grow and planning my garden.

What "new to you" vegetables are you going to try growing this year? Do you have any pointers for those us who will be growing kale, leeks or edamame?

Wednesday, July 17, 2013

Make Sure to Harvest String Beans When Ready

Image: Gibby's Garden
Though it may be a little early for those of us in the north to be out harvesting our string beans, it’s important to do so when they’re ready. This helps extend the harvest season and fill our freezers and pantries with plenty of crisp, tasty beans for the winter to come. So, why is picking all mature string beans a must?

String beans need to be harvested when mature in order for the plants to produce more - plain and simple. This may be annoying to some, but to me, it sounds like a good idea. Why should the plant waste it’s energy on producing a crop of beans if no one is there to harvest them?

String beans are typically ready for harvest when the seeds inside begin to swell. Of course harvest time differs depending on the variety, but on average, go ahead and pick them while the pods are still tender and check the back of your seed packet for the average bean length when ready for harvest.

You may think that waiting to harvest string beans when they’re several inches long and busting with ripe seeds will get you more bean for your buck - but you’re going to miss out on great taste and texture. Fat string beans become stringy, take on a woody texture and really lose a lot of that fresh, crisp flavor they’re known for straight from the garden.

I do lots of sampling to make sure my beans are ready before setting out to harvest - yum! I planted two varieties of string beans this year, Imperial Golden Wax ready for harvest at about 4-5 inches long, and Blue Lake pole beans ready around 6 inches or so.

Unfortunately due to the weather, I’ve had to replant many of my beans and will not be harvesting until later in the season. String beans are one of my favorite vegetables to eat and grow and I can’t wait for the sampling to begin!


What are some of your favorite vegetables?

Related Articles


Monday, July 15, 2013

Gibby's Garden Diary Entry #7: Snail Alert!


July 15, 2013

When it comes to the usual pests in my garden, I’ve never had a problem with snails until now. Heck, I’ve hardly ever seen them sans the beach until this season. Not only have I been spotting snails in their tiny orange shells sticking to my weed bucket and popping up in the rows of my garden, but I’ve noticed quite a few while out walking the dogs.

I wondered why the sudden influx of snails. Could it be the heavy rains and intense humidity on the odd day of sunshine? Is there something different about my gardens that these snails are attracted too? I did a little reading in one of my go to garden books, Rodale Organic Gardening Basics, “Pests” and found that snails, much like slugs, are attracted to decaying plant matter and love to feed on young plants.

I do have a thick layer of mulch hay in two of my gardens and several inches of leaves in another used to prevent weeds and to keep the ground moist. While I will not forgo my mulch, it drastically reduces the amount of time I spend weeding, I have found a quick, cheap and organic solution to help control these slimy trailed garden pests - beer traps.

I’ve used beer traps to control the slug population in my gardens for quite a few years now, and I’ve been happy with the results. I’ve doubled my efforts and put out more beer traps where I’ve noticed the highest population of snails. I’ve attracted quite a few so far, and make sure to hand pick all snails that I see when weeding.

Snails and slugs are attracted to the yeast in beer, which if you’re like me, you always have an odd can or two in the fridge. I set out my traps in a shady spot slightly away from the garden if possible. Intense sun leads to mold in the traps causing them to need to be changed more often, and placing the traps outside of the garden lures the snails out rather than in.

If you’d like to know how to easily make your own snail and slug beer traps, click on over to my post, How to Make Your Own Slug Traps, to find out how.


What pests have you noticed in your garden this year?


View all Gibby's Garden Diary Entries

Gibby's Garden Diary entry #6 - Plant List (previous entry)

Wednesday, July 3, 2013

How to Keep Your Garden Healthy in Dry Weather

Image: Gibby's Garden
When there is no rain in sight for days at a time and the humidity rises a few notches, it tends to leave garden soil hard and dry - neither of which are good for plants. Dry weather stunts plants and if it gets really bad, kills them off. To help coax your garden through dry weather - water, mulch and cultivate.

Water


Yes, I’m well aware that I’m stating the obvious here. Truth be told, I never water my gardens, even when they are dry, simply because none of them are anywhere near a hose so I don’t have that option. If you are going to drag out the hose or set up the sprinkler, make sure not to over water (no puddling), do not drag the hose across any plants and water in early mornings to prevent disease and fungus.

Mulch


That’s right - mulch. You may think covering the ground near or around your plants with a material that prevents weeds may inhibit water from penetrating the soil, but it doesn’t. A fine layer of mulch helps keep garden soil moist, because it keeps water from evaporating, especially in hot, dry weather.

The rule of thumb for mulching is to leave a 3-4 inch diameter around seedlings and rows of seeds that have recently been sown. Wait until plants have had some time to grow and anchor themselves with their roots before pushing the mulch to within an inch or two of plants.

Cultivate


Another great way to keep gardens growing healthy and strong during dry weather is to cultivate the soil around plants. Be gentle making sure not to disturb the plant’s roots, especially the roots of young plants. I use a hand cultivator to loosen the soil, especially when the soil is dry. This helps let in moisture and gives oxygen a chance to circulate.


How has the weather been in your area this gardening season? Mine has gone from sopping wet to dry and back again. 

Monday, July 1, 2013

3 Organic Ways to Stop Weeds from Growing

Image: Gibby's Garden
Weeds are the last thing we gardeners want to see growing, especially in abundance. Not only do they soak up vital nutrients, water and sunlight, they take time to pull - a time consuming task. Over the years I’ve found 3 ways that really help keep weeds from growing including mulching, cultivating and weeding more frequently, helping to free up my summer for more fun activities.

1#: Mulch! Mulch! Mulch!


One of the best ways to stop weeds from growing is by mulching, and this is something that I cannot stress enough. Mulch prevents weeds from growing while helping the soil stay moist, so it’s like getting a 2 for 1 deal. There are many varieties of mulches to suit your needs and tastes including hay, straw, bark, pine needles, crushed peanut shells etc.

Note: I’ve been using mulch hay as mulch for years now mainly because I live on a farm and it’s free and readily available to me. This year after my garden was tilled, I immediately put down a thick layer of mulch to stop weeds from growing before I had a chance to plant. Now, I still get some weeds, but I’ve cut the time I used to spend weeding by about 2/3.

#2: Cultivate


Cultivate around larger plants making sure not to disturb their roots and between rows using a hand held or electric cultivator. I use a hand held cultivator to lightly turn the soil. This uproots weeds as well as their seeds before they have a chance to grow. This is one of the more physical and time consuming ways to stop weeds from growing but it works; especially when coupled with mulch.

#3: Weed Frequently


The more often you weed the fewer weeds you’ll have to pull. When you get rid of weeds by cultivating or pulling by hand, you disturb the soil which helps stop future weeds from growing as well as eliminate the ones already there. I like to check my gardens every few days and pull or cultivate any weeds to stay on top of things.


As much as I would love to say I don’t get any weeds, I can’t, but I’m happy to report I’ve drastically cut down the time I spend weeding my garden. I encourage you to try the 3 ways I’ve shared and to key me in on any of your own ideas. Mind you I’m an organic gardener, so spraying with pesticides isn’t an option for me.

Monday, June 24, 2013

Gibby's Garden Diary entry #6 - Plant List

After a 2 week hiatus from blogging, I’m back with a garden diary entry. I know the last entry I made I complained about the weather and yes, I’m here to complain about it again, but only for a few sentences. The weather here in Maine has been all over the place. We either get downpours or it’s hot and humid for days at a time wreaking havoc on my garden soil.

With that being said, I’ve replanted a few of my cucumber mounds and will probably have to replant some of my beans as well. I’ve heard from a number of people, one who works in a lawn and garden center, that many people are having to replant some of their seeds due to sporadic weather we've been having. On a lighter note, my transplants seem to be doing fine as they already have roots and have established their places in the garden.

Okay - enough of the complaining already - right? Here’s what I have in the ground so fa,r and yes, I still have more to plant as I have run out of space and need to make some new garden beds for my root vegetables and corn. Not having planted my corn yet is what is really bothering me - but that’s a different story that'll I'll share in another garden diary entry.

What's Growing in Gibby's Garden in 2013


  • “Hybrid Miss Pickler” Cucumbers - 6/15/13 - 6/20/13 *
  • “Beefmaster” Tomatoes - 5/27/13
  • Cherry Tomatoes - 5/27/13
  • "Roma" Tomatoes - 6/3/13
  • “Viva Italia” Tomatoes - 6/3/13
  • “Premium Crop” Broccoli - 6/10/13
  • “Snow Crown” Cauliflower - 6/10/13
  • Jalapenos - 6/10/13
  • "Mesclun Mix" Lettuce – 6/13/13
  • “Hybrid Tyee” Spinach - 6/15/13
  • “Northfield” Peas - 6/13/13
  • “Blue Lake” Pole Beans - 6/5/13 - 6/19/13
  • “Golden” Wax Beans- 6/5/13  - 6/20/13
  • “Early White Vienna” Kohlrabi - 6/15/13
  • “Bright Lights” Swiss Chard - 6/15/13
  • “Hybrid Twilight” Eggplant - 6/15/13
* The dates listed are planting dates


Now you can see why I’ve run out of room in my 3 exiting garden beds. I’m definitely one of those crazy gardeners who loves planting everything under the sun. I’ve never grown Swiss chard or eggplant, so I’m anxious to see how they grow this year and I’ll be sure to let you know.

Is anyone else having any gardening issues this growing season? I’d love to hear about em’ below.

View Previous Garden Diary Entries


Wednesday, June 5, 2013

5 Quick Tips for Planting Tomatoes

Image: Jolly Janner 
Before heading out to plant your tomatoes, pick a spot in the garden that receives full sun, a good 6-8 hours a day, and one that has fertile, well-draining soil. Then, set your seedlings up for success by following these 5 tips for planting tomatoes.

Tip #1: Pinch off Bottom Leaves of Tomatoes


Pinching of the bottom most leaves of tomato plants encourages them to grow bushy and full rather than tall and thin. Pinch off only the bottom leaves, leaving the true leaves intact. True leaves are those that are main branches and have two to three sets of leaves per branch already.

Tip #2: Sprinkle the Ground with Egg Shells


In the weeks leading up to planting time, save your egg shells. Crush them up and sprinkle them in the holes in which you’ll be planting your tomatoes. Egg shells give the soil a boost of calcium, something your tomatoes will be thankful for. Make sure the shells are clean and crush them up before sprinkling them.

Tip #3: Size and Depth of Planting Holes


Holes should be twice as wide as the root ball of tomato seedlings and deep enough to plant tomatoes up to their first set of true leaves. Planting tomatoes at this depth gives them the support they need as they grow tall and wide, helping to keep their roots anchored.

Tip #4: Gently Loosen Root Ball of Tomato Seedlings


Gently loosen the root balls of tomato seedlings to entice the roots to spread out and anchor themselves once they’ve become established. It’s okay if some of the roots break. Loosen the ball about 3/4 of the way up, leaving the top of the ball intact.

Tip #5: Cage Tomatoes from the Start


After planting tomato seedlings, cage them right away. Doing this from the start is much easier than trying to slip a tomato cage over a mid to full-size plant and it’s many branches and leaves. You can also make your own support systems out of garden stakes and twine. 

Do you have any tips to share about planting tomatoes?


Related Articles

How to Harden Off Vegetable Plants


Monday, June 3, 2013

Gibby’s Garden Diary Entry #5 - Excessive Rain & Heat

June 3, 2013

The weather lately really hasn’t been cooperating with my vegetable gardening - that is for sure.  Over Memorial Day weekend we had a North Easter which dumped lots of rain, completely saturating the ground and making it impossible to plant anything without risking a washout or root rot.

This weekend, the temps hovered around 100 degrees making it unfit for this gardener to head out and plant during the day - though I did manage to get my tomato plants in the ground Friday night as well as 2 rows of cucumbers - planted in hills of course.

What I planned on doing was planting all my cucumbers, which I’m planting a lot of to make pickles this year, and my lettuce. That didn’t happen. Today the weather is cooler and we’ve had some more rain which is expected throughout the day.

The rest of my gardens were rototilled this morning, so I’ll be busy planting away this week as long as the weather cooperates, as I’ve learned heat is not my friend. I plan on laying down my mulch hay first and then planting. I did this where my tomatoes and cucumbers were planted and it saves time. I simply raked the mulch back where I wanted to plant and that was it.

On a side note, I was glad I put my tomatoes in this weekend because they were beginning to outgrow their pots. Use your judgment when it comes to hardening off seedlings. My tomatoes didn’t quite get 2 weeks of hardening off but they’re doing just fine in the garden.

View Previous Posts


Friday, May 31, 2013

Hardening Off Vegetable Plants

Image: Downtowngal
Whether you started your own vegetables from seed or bought them from the local nursery, your plants need a little hardening off before being transplanted into the garden. What exactly does hardening off mean and just how easy is it?

What Does Hardening Off Mean?


Hardening off vegetable plants simply prepares them for the outside elements including temperature, wind and rain. Chances are, your plants have been on a sunny windowsill or tucked in a temperature controlled greenhouse. Hardening them off prevents them from going into shock after being transplanted.

How to Harden Off Vegetable Plants


  • Find a semi-sunny location out of the wind and rain
  • Week 1 - Leave vegetable plants outdoors for 4 hours
  • Week 2 - Extend time outdoors to 6-8 hours
  • Remember to bring plants indoors at night especially if a frost or low temperatures are forecast 


Hardening off vegetable plants is easy and takes a matter of moving plants in and out of the house. To make things a little easier, place plants on a tray or wheeled cart to make carrying to and fro a simple task. As always, don’t forget to water vegetable plants to keep them growing healthy and strong.

Related Articles

Wednesday, May 29, 2013

How to Grow Cucumbers in the North


Image: Rusty.Grass
Cucumbers are easy to grow in the north and come in a number of varieties suitable for all gardens. Choose a variety according to space and use. Pickling cucumbers are best for making pickles while slicing cukes are great in salads. Grow in containers, along a trellis or in hills on the ground.

Vegetable Type: Annual
Name: Cucumis sativus
Family: Cucurbitaceous (gourd)

How to Start Cucumber Seeds in the North


  • Cucumbers can be sown directly in the garden in the north because they take 70 days or less to mature. 


When to Plant: After all danger of frost has passed
Soil Type: Fertile, well-drained, slightly acidic
Light: Full sun
Spacing: Sow cucumber seeds 1" deep and 4-5 per hill, with hills 6' apart
Thinning: Thin cucumbers to 2 per hill when seedlings reach 2" tall
Watering: Keep well watered especially during dry periods
Fertilization: Amend soil with finished compost or composted manure to keep fertile
Mulching: Mulch to prevent weeds and retain moisture
Weeding: Weed when plants are dry to reduce the risk of spreading disease
Average Days to Germination: 6-10 days

Common Cucumber Pests and Diseases


Cucumber Pests 


Cucumber Beetles: Small yellow insects with black spots or stripes. Known for chewing holes in the leaves of cucumber plants, often killing them off. Spray with warm soapy water  and handpick to control them organically.

Cucumber Diseases 


Bacteria Wilt: Causes plants to wilt and die off. Pull diseased plants to keep bacteria wilt from spreading. Only pull plants that don’t recover from wilt during cooler temperatures. Some plants may wilt during the heat of the day.

Powdery Mildew: Caused by a fungus and resembles white dust on plant leaves. Small powdery spots can spread. Plant resistant cucumbers & rotate crops to prevent powdery mildew. Spray affected plants with neem oil to control those already affected.

Downy Mildew: Caused by a fungus which appears as small yellow spots on plant leaves, browning and drying them causing them to die off. To prevent, plant disease resistant cucumbers and dispose of parts of the plant already affected.

How to Harvest Cucumbers


  • Twist and snap cucumbers from the vine when they reach desired size (size varies per variety)
  • Harvest before they turn yellow and plump

Best Varieties of Cucumbers to Grow in the North


Related Articles
How to Blanch and Freeze Vegetables
How to Make Your Own Seed Tapes

Friday, May 24, 2013

Best Varieties of Cucumber to Grow in the North


Image: Rusty.Grass

There are many types and varieties of cucumbers to choose from, all of which can be grown in the north because most take 55 days or less to mature. This makes choosing a variety based on taste and use easier, whether it's a pickling cuke, one that's great in a salad, or one that contains few seeds and less acid making it easier on the digestive system.

Types of Cucumbers


Slicing: Cucumbers average 7-9" long with relatively thin skins and few spines

Pickling: Cucumbers average 4-5" long and are block-shaped with minimal spines

Seedless and Thin Skinned: Few to no seeds with thin skins

Specialty: Cucumbers that are unique is size, color & shape

Slicing Cucumber Varieties


Slicing Cucumbers
Sweet Yet Hybrid: Early variety produces 10-12" long cucumbers. Burpless, sweet and thin skinned. Dark green in color. 48 days.

Corinto: American variety growing 7-8" long with dark green skins. Does well in hot or cool weather. Small seed cavity. 48 days.

General Lee: American variety growing 8-8.5" long with dark skins and white spines. Averages high yields. 52 days.

Olympian: American variety growing 8-9" long with dark green skins. Crisp with a fresh flavor. Produces high yields. Very disease resistant. 52 days.

Early Spring Burpless Hybrid: Vigorous variety produces 12-15" long cucumbers with dark green skins and bright white flesh. Crisp and mild in taste. 52 days.

Marketmore: American variety growing 8-9" long with dark green skins. Slender in size. Popular in the north. 58 days.

Sweet Slice Hybrid: Burpless variety produces 10-12" cucumbers that are bitter-free and mild in flavor. Tolerates mildew and scab. 63 days.

Straight Eight: Produces 8" cucumbers up to 2.5" wide and dark green in color. Crisp with a small seed cavity. 65 days.

Pickling Cucumber Varieties


Pickling Cucumbers
Harmonie: European variety best when harvested at 3-5". Produces high yields of dark green cucumbers with noticeable taste. 47 days.

Bush Pickle Hybrid: Extra early variety produces 5" cucumbers. Great for small gardens or containers. Mild in flavor. 45 days.

Northern Pickling: American variety best when harvested at 3-5". Produces medium green fruits on compact vines. Great for small gardens and containers. 48 days.

Vertina: European variety best when harvested at 3-5". Produces high yields of dark green cucumbers with black spines. 49 days.

Jackson Classic: American variety best when harvested at 3-5". Blocky in size and dark green in color with white spines. Disease resistant. 49 days.

Salt and Pepper: American variety best when harvested at 3-5". Produces white skinned cucumbers with black spines. Disease resistant. 49 days.

Adam Gherkin: European variety best when harvested at 2-3". Produces high yields of dark green cucumbers with noticeable taste. 50 days.

Excelsior: American variety best when harvested at 4-5". Produces high yields of dark green, blocky cucumbers. Intense flavor. 50 days.

Miss Pickler Hybrid: Early, vigorous  variety. Cucumbers are crisp, blocky and medium-green in color. Retains crispness when pickled. 50 days.

Little Leaf: American variety best when harvested at 3-5". Produces emerald green skinned cucumbers on compact vines. Great for pickling or eating fresh. 57 days.

Eureka Hybrid: Great variety for pickling or slicing. Harvest at 2-4" for pickling and 7" for slicing. Vigorous plants produce deep green skinned cucumbers. 57 days.

Sassy Hybrid: Great variety for pickling or slicing. Harvest at 3-5" for pickling or 6-10" for slicing. Produces crisp and plump cucumbers. 57 days.

Seedless and Thin Skinned Varieties of Cucumbers


Seedless Cucumbers
Rocky: Extra early and seedless variety best when harvested at 3.5". Very tender. High yielding.

Katrina: Seedless variety best when harvested at 5.5-6.5". Medium sized and full of flavor. 49 days.

Socrates: Thin skinned and seedless  variety grows 7-8". Sweet and tender in taste. Dark skinned. 52 days.

Sweet Success Hybrid: Early seedless variety. Crisp, mild in flavor and acid-free cucumbers reach an average of 14". Tolerates scab and mosaic virus. 54 days.

Amiga: Thin skinned variety grows 6" cucumbers. Flavorful and dark green in color. Disease resistant. 55 days.

Tyria: Seedless variety grows up to 14". Dark green cucumbers are slightly ribbed. Resistant to target spot. 56 days.

Diva: Seedless and bitter-free variety. Cucumbers are crisp and sweet to taste. 58 days.

Iznik Hybrid: Gourmet cocktail variety with thin skin and very few seeds. Mimics melon in taste. Vigorous variety great for eating fresh. Pickles well. 60 days.

Specialty Varieties of Cucumbers


Specialty Cucumbers
Tasty Jade: Produces 11-12" cucumbers on high yielding plants. Fresh in flavor and thin skinned. 54 days.

Suyo Long: Chinese variety produces cucumbers up to 15". Very adaptable. Great for pickling. 61 days.

Striped Armenian: Produces flavorful cucumbers that are best when harvested at 8-18". Grows “S” in shape. Flavorful. Skins alternate between dark and light green stripes. 63 days.

Lemon: Produces sweet and flavorful yellow skinned cucumbers resembling lemons. Best when harvested at 1.5-2.5". Good fresh or pickled. 65 days.


Wednesday, May 22, 2013

Gibby's Garden Diary Entry #4: Hardening Off Tomato Plants


May 22, 2013

Over the weekend, I went to my favorite local garden nursery and snapped up a bunch of tomato plants. Though I won’t be planting them for another week or so, I wanted to make sure I got the varieties I wanted this year. Last year, by the time I got around to buying my tomato plants, they were practically sold out of the varieties I wanted and I didn’t get any sauce tomatoes.

This year I plan on canning my own tomato sauce so I went a little overboard on the tomato plants. For sauce tomatoes I choose “Vita Italia” and “Roma.” I also picked up a couple of “Beefmaster” plants for slicing as well as a couple of cherry tomatoes for snacking.

The tomato plants I bought were still nestled in a nice, warm greenhouse so I need to harden them off a bit before planting them in the ground. I left them outdoors on Sunday for a good 4 hours after bringing them home and continue to do so while bringing them in at night.

I plan on leaving them outdoors during the day for 4 hours at a time for the rest of the week. Come the weekend I’ll start leaving them out for 6-8 hours depending on the weather. I keep them in a semi sunny spot and out of the wind. When I’m ready to plant, my tomatoes will be hardened off and not shocked by the outside temperatures.

The funny thing is, I don’t even like tomatoes unless they come in sauce or ketchup form, but the rest of my family loves them so I always make sure to plant plenty.

View Previous Garden Diary Entry


Monday, May 20, 2013

How to Grow Corn in the North


Image: freedigitalphotos.net
Corn is a staple in the U.S. and around the world. For home gardeners, it can be eaten fresh, frozen or canned for later use. The keys to successfully growing corn in the north are to plant an early variety and wait until the weather is warm to sow it to help stave off certain pests and diseases.

Vegetable Type: Annual
Name: Zea mays
Family: Grass

Starting Corn Seeds in the North


When to Plant: After all danger of frost has passed and soil temps are at least 60°F
Soil Type: Fertile, well-draining
Spacing: Sow seeds 1.5" deep and 5" apart in rows 24" apart
Thinning: Thin to 10" apart after seedlings reach 2-3" tall
Light: Full sun
Fertilization: Amend soil with finished compost or composted manure for added nutrients
Watering: Keep well watered especially during dry periods to prevent stunted growth
Mulching: Mulch to prevent weeds and retain moisture
Average Days to Germination: 6-10 days
Additional Care: Plant several short rows rather than 1 or 2 for better pollination. Also, planting corn in cold temperatures can result in poor germination

Common Corn Pests and Diseases


Pests 


Corn Earworms: 1-2” worms are light green to brown in color, hatching from moth eggs. They feed on silk and kernels. Lightly spray tips of ears with organic mineral oil to prevent infestation.

European Corn Borer: Moths lay eggs on undersides of leaves. Hatched larvae borrow into ears and stalks where they feed. If broken tassels & bent stalks appear, spray with organic pesticide, closely following directions.

Corn Root Aphids: Tiny and light green in color. Aphids feed on plant roots often resulting in stunted growth and yellowing of stalks. Prevent by clearing the garden of all ant nests to stop aphids from over wintering in them.

Wireworms: .5 - 1.5” inches long and yellowish-brown larvae. Wireworms feed on the plant roots causing damage. To prevent these pests, cultivate the soil throughout the growing season and rotate crops each year.

Seed Corn Maggots: .5” long cream-colored larvae bore into sprouted seeds stopping their growth. Prevent by planting corn in warmer weather.

* Of course some animals such as raccoon and deer are attracted to corn as well. There are many deterrents on the market to stave off 4-legged pests. Try hanging mesh bags filled with human or dog hair to scare away these pests as a cheap alternative to store bought deterrents.

Diseases 


Stewart’s Bacteria Wilt: Causes early development of tassels, reduced pollination and stunted or wilted plants. Prevent by planting disease resistant varieties of corn, rotating crops and clearing the garden of all plant debris in fall.

Root Rot: Corn plants are stunted or severely misshapen. Commonly causes roots to rot. Caused by fungi. Prevent by planting corn in well-drained soil and in warm weather.

Northern Corn Leaf Blight: Caused by a fungus. Long, gray, green or tan spots appear on leaves of plants. Spots can spread. Loss of corn may result in humid areas from leaf blight. Prevent by planting resistant varieties and rotating crops.

Pest and disease source: garden.org


How to Harvest Corn


  • Twist and pull ears of corn from stalks when kernels have filled out 
  • Test the kernels by piercing with a thumb nail. Corn should be harvested when a milky-white substance is produced

Types of Corn


When leafing through the seed catalog, you’ll come across abbreviations in the corn descriptions. I have listed each abbreviation, what it stands for and what it means. Abbreviations are included  in each description of corn I have listed as well.

(se) - Sugary-Enhanced Hybrids: Contains high levels of sugar between 14-35% depending on the variety. Known for its creamy texture, taste and tenderness.

(su) - Normal or High Sugar Hybrids: Contains 9-16% sugar depending on the variety. Known for its full flavor and firm, creamy texture.

(sh2) Super Sweet Hybrids: Contains very high sugar levels between 28-44% depending on the variety. Known for its super-sweet flavor and crisp texture.

Synergistic: A cross between (se) and (sh2) varieties containing 75% (se) kernels and 25% (sh2) kernels. Known for its tenderness and sweet flavor.


  • Varieties of corn come in 3 colors: yellow, white and bicolor. To simplify this post, I have listed varieties by color. 


Varieties of Corn


Yellow Varieties of Corn


Early Sunglow Hybrid (se): Early variety. Ears grow 6-7” with meaty kernels on short stalks. 62 days.

Legend Hybrid (se): Early variety. Ears grow 7-9” with plump, creamy-sweet kernels. Disease resistant and cold hardy making it a great choice for the north. 65 days.

Spring Treat (se): Yellow sweet variety. Easy harvesting. 66 days.

Precocious Hybrid (se): Early variety. Grows full-tipped ears on 5’ stalks. Sweet to taste. Adapts well. 66 days.

Northern Xtra-Sweet (sh2): Early, tender variety. A northern favorite because it germinates well in cold soils. Large ears are sweet in flavor. Comes in yellow, white and bicolor varieties. 67 days.

Sugar Buns (se): Kernels are deep and narrow. Variety holds up well in the garden. 70 days.

Bicolor Varieties of Corn


Native Gem Hybrid (se): Early variety. Ears grow an average of 8” with full rows of kernels. Very sweet. 66 days.

Trinity (se): Very sweet variety with crisp, fine kernels and narrow ears. Does well when planted in cool weather making it great for the north. 68 days.

Quickie (se): Tender, sweet variety. Ears average 7". Does well in cold soil making it great for the north. 68 days.

Pay Dirt (synergistic): Very sweet variety with tender kernels. Ears grow 7.5-8" long. Tolerates rust. 69 days.

Related Articles

How to Blanch and Freeze Vegetables
How to Make Your Own Seed Tapes

Wednesday, May 15, 2013

Best Varieties of Sweet Corn to Grow in the North

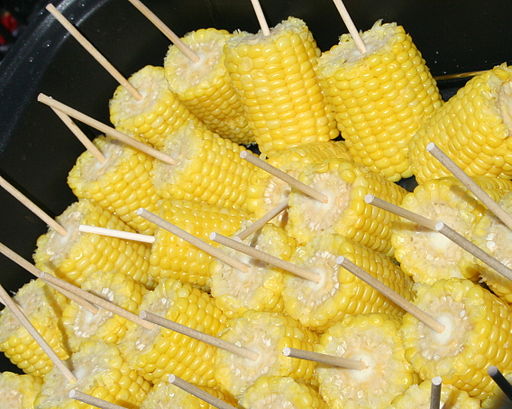
Image: Jonathunder

Corn is a staple in many northern gardens across the U.S. Not only is it versatile, it comes in many different varieties ranging from super sweet to the kind that you pop. For gardeners in the north, the best varieties of corn to grow take 70 days or less to mature.

Types of Corn


When leafing through the seed catalog, you’ll come across abbreviations in the corn descriptions. I have listed each abbreviation, what it stands for and what it means. Abbreviations are included  in each description of corn I have listed as well.

(se) - Sugary-Enhanced Hybrids: Contains high levels of sugar between 14-35% depending on the variety. Known for its creamy texture, taste and tenderness.

(su) - Normal or High Sugar Hybrids: Contains 9-16% sugar depending on the variety. Known for its full flavor and firm, creamy texture.

(sh2) Super Sweet Hybrids: Contains very high sugar levels between 28-44% depending on the variety. Known for its super-sweet flavor and crisp texture.

Synergistic: A cross between (se) and (sh2) varieties containing 75% (se) kernels and 25% (sh2) kernels. Known for its tenderness and sweet flavor.


  • Varieties of corn come in 3 colors: yellow, white and bicolor. To simplify this post, I have listed varieties by color. 


Varieties of Corn


Yellow Varieties of Corn


Early Sunglow Hybrid (se): Early variety. Ears grow 6-7” with meaty kernels on short stalks. 62 days.

Legend Hybrid (se): Early variety. Ears grow 7-9” with plump, creamy-sweet kernels. Disease resistant and cold hardy making it a great choice for the north. 65 days.

Spring Treat (se): Yellow sweet variety. Easy harvesting. 66 days.

Precocious Hybrid (se): Early variety. Grows full-tipped ears on 5’ stalks. Sweet to taste. Adapts well. 66 days.

Northern Xtra-Sweet (sh2): Early, tender variety. A northern favorite because it germinates well in cold soils. Large ears are sweet in flavor. Comes in yellow, white and bicolor varieties. 67 days.

Sugar Buns (se): Kernels are deep and narrow. Variety holds up well in the garden. 70 days.

Bicolor Varieties of Corn


Native Gem Hybrid (se): Early variety. Ears grow an average of 8” with full rows of kernels. Very sweet. 66 days.

Trinity (se): Very sweet variety with crisp, fine kernels and narrow ears. Does well when planted in cool weather making it great for the north. 68 days.

Quickie (se): Tender, sweet variety. Ears average 7". Does well in cold soil making it great for the north. 68 days.

Pay Dirt (synergistic): Very sweet variety with tender kernels. Ears grow 7.5-8" long. Tolerates rust. 69 days.


Monday, May 13, 2013

Best Varieties of Vegetables to Grow in the North


The north may have a short growing season, but that doesn’t mean gardeners have to skimp on the types and varieties of vegetables they grow. The best vegetables take 70 days or less to mature and some, such as melons and pumpkins, should be started indoors or bought at the local nursery to save on time.

Please remember this list is a work in progress as I work my way through the list of vegetables and it will be updated weekly. Click the links below to find lists of the best varieties of vegetables to grow in the north.