Showing posts with label freeze. Show all posts

Monday, October 22, 2012

How to Freeze Fresh Pumpkins from the Garden

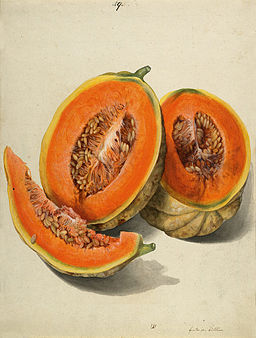
Image: Emilie von Büttner/Wikimedia Commons
Pumpkins are for more than carving jack-o-lanterns, they’re for eating too. If you’ve grown your own pumpkins or have picked up a bunch from the local apple orchard or farmers market for eating, freeze them for later use in pies, soups and butters. Here’s how to freeze pumpkins in 7 easy steps.


Which Pumpkins are Best for Eating?

Sugar pumpkins or pie pumpkins taste the best. They’re a little sweeter and less stringy than those you carve for Halloween. When planning your garden, consider planting the following to use in your favorite pumpkin recipes.

  • Baby Pam
  • New England Pie
  • Winter Luxury
  • Gurney’s 
    ® 
    Giant Magic Hybrid
  • Big Max

How to Freeze Fresh Pumpkin


Step 1:
Quarter pumpkins by cutting in half and then cutting each halve in half


Step 2: Scoop out seeds and save them for toasting or frying, remove strings attached to pumpkin flesh

Step 3: Place pumpkin halves skin side down in baking pan. Add about ¼” water to the pan, cover and bake for 1 hour at 300° F or until flesh is easily pierced with knife

Step 4: Uncover and let pumpkins rest until cool enough to handle

Step 5: Remove pumpkin flesh from skin and cut into 2 - 3” pieces

Step 6: Puree in food processor until smooth or freeze pieces as is depending on what pumpkin will be used for

Step 7: Let pumpkin cool before placing in freezer bags or containers. Measure precise amount of pureed pumpkin and label each bag with amount and date frozen. To freeze pieces of pumpkin, place on a cookie sheet uncovered and pop into the freezer. When frozen, remove pumpkin pieces from cookie sheet and pop into freezer bags, label and date. This method allows you to remove as much or as little pumpkin from the bag as you like and return the rest to the freezer for later use.

What are some of your favorite pumpkin recipes?


Wednesday, August 29, 2012

How to Freeze Herbs in 4 Easy Steps


Freezing herbs is easy, plain and simple. All it takes is a few minutes of prep work and a couple of supplies found in most kitchens. In four easy steps, learn to freeze your favorites and preserve them for winter use.

Supplies


  • Cutting Board
  • Knife (paring)
  • Teaspoon
  • Ice Cube Tray
  • Freezer Bags


Step 1: Gather Herbs


The best herbs to freeze are fresh and unblemished. Allow them to mature to your liking and harvest before they get woody or start to wilt. Shake them free of bugs, dirt and debris.

Step 2: Preparation


It’s important to prepare your herbs before freezing. Think about how you normally use the ones already in your kitchen cupboards. Cut, slice and dice them to size using your kitchen knife. I prefer my paring knife and sometimes, my food processor which I use to prepare herbs like basil.

Step 3: Fill Ice Cube Trays


Using your teaspoon, fill each slot in your ice cube tray with 1 teaspoon of prepared herbs. Top off each slot with water and pop the tray into the freezer. As you fill the tray with water, expect them to float to the top.

Step 4: Remove from Tray and Store


When your herb cubes have fully frozen, pop them out of the tray and into freezer bags or containers. Make sure to label each bag with type of herb, amount per cube and date. Pop the bags back into the freezer, storing different types in different bags.


Enjoy Your Fresh, Frozen Herbs


When it’s time to spice up your meals, simply take the desired amount of cubes from your freezer and drop them into your hot dishes. There’s no need to thaw the cubes beforehand as the cubes quickly melt. Add to soups, stews sauces and more. Enjoy!

What are some of your favorite herbs?


Monday, August 6, 2012

How to Freeze Vegetables to Enjoy Them Year-Round


Image: Gibby's Garden
I don’t know about you, but I love cracking open the freezer and pulling out a bag of organic vegetables from my garden as Maine dips into freezing temperatures and our beautiful state gets blanketed in snow. Freezing vegetables, whether from your own garden or those bought at the local farmers market, allows you to enjoy their fresh taste year-round. The good news, even for those without a green thumb; vegetables are easy to freeze in a matter of minutes.

3 Rules for Choosing the Best Vegetables to Freeze


When choosing which vegetables to freeze, always abide by these 3 rules:


  • Fully Ripened
  • Unblemished
  • Undamaged

Blanch those Vegetables


Blanching vegetables is fast and easy. Frankly, it takes longer for the water to boil than it does to blanch a batch of veggies. What is blanching? It’s placing vegetables into boiling water for a set amount of time, removing them and immediately dunking them into a sink or bowlful of iced water. The heat only begins to cook the vegetables so they remain crisp and retain their fresh taste. The iced-water stops the cooking process so vegetables don’t become mushy.

Before blanching, remove any dirt and debris from your vegetables. Trim and peel as needed and cut, slice and dice into desired pieces. Think about how you use the vegetables the most. Are they for soups and stews, casseroles or side dishes? Think and prep ahead.

Vegetable Blanching Times


Vegetable
Blanch Time
Asparagus *
2–4 mins
Beans
2-3 mins
Broccoli *
3-5 mins
Cabbage
1 ½ mins
Carrots
3-5 mins
Cauliflower
3 mins
Corn *
4-8 mins
Onions *
2-4 mins
Parsnips
2 mins
Peas *
1 ½ -3 mins
Potatoes
Fully Cook
Squash
1 ½ mins
Tomatoes
15 seconds
Turnips
2 ½ mins

Asparagus: Thin Stems: 2 Mins - Thick Stems: 4 Mins
Broccoli: Thin Stems: 3 Mins - Med. Stems: 4 Mins - Thick Stems: 5 Mins
Corn: Small: 4 Mins - Med: 6 Mins - Large: 8 Mins (Ears) Kernels: 3-4 Mins
Onions: Chopped: 2 Mins - Whole: 4 Mins (small)
Peas: Edible Pods: 1 ½-3 Mins - Shelled: 1 1/2 Mins


Choose a Freezing Method


Tray Pack Method: Spread vegetables on a cookie sheet so they aren’t touching. Pop the sheet into the freezer. When vegetables are frozen solid, remove from the cookie sheet and place in freezer-safe storage bags or containers. The tray pack method freezes vegetables individually, so a precise amount can be removed from the containers and used at any time.

Dry Pack Method: Pack vegetables into containers or freezer bags. Amounts can be measured ahead of time, i.e. 1 cup or 2. Seal and freeze.

Additional Freezing Tips


  • Some vegetables will change color when blanched, in most cases, it’s a slight change. Sometimes, a more dramatic color change happens; for instance, when burgundy beans are blanched, they change from purple to dark green in color.
  • Before popping vegetables into the freezer, pat them dry to remove excess moisture. This helps to prevent freezer burn.
  • When using containers to freeze vegetables, leave a ½ inch of head space between the veggies and the lid.
  • When using freezer bags, remove as much air as possible before sealing to help prevent freezer burn.

Freezing vegetables, the same can be applied to fruit, is a sure way to enjoy them year-round. When it comes to certain vegetables like carrots and beans, I freeze them in different sizes to eat as a healthy side dish or add to a stew simmering away in the crock pot all day. Either way, using either freezing method, vegetables hold on to that fresh from the garden taste. If you don’t believe me, try it for yourself and you’ll see.


Monday, May 21, 2012

How to Freeze Rhubarb in 4 Steps


Rhubarb at Farmers Market

Rhubarb is a staple in many Maine gardens; I know it is in mine. In the right soil and under the proper growing conditions, it comes back every year with a vengeance. As a kid I often picked and peeled rhubarb and dipped it in a little sugar before eating. As an adult, my tastes have changed but I still love rhubarb in a warm crisp or in cookies. *

During the summer there’s an abundant supply of rhubarb but when winter rolls around, it’s now where to be seen. So how can we enjoy rhubarb in all its glory during the winter months? By blanching and freezing it. Here’s how:

Step 1: Select the Best Rhubarb


Only select undamaged stalks of rhubarb with no signs of spoilage. If the majority of the stalk is split, toss it. If only a small portion of the stalk is damaged, cut that part off and keep the rest. Choose stalks that are at the thickness you prefer.

Step 2: Prepare for Blanching


I wait until I’m ready to blanch the rhubarb before I pick and peel it. This way the stalks stay fresh and keep their color and texture.

Trim & Peel: Trim the ends of the rhubarb and peel. I use my cutting knife to quickly and easily whisk away all peelings.

Cut: Cut rhubarb into chunks ½ inch to an inch in size. I prefer my chunks a little smaller so I cut them to ½ an inch. Size yours to your preference.

Step 3: Blanching


Bring Water to Boil: Fill a pot with water and bring to a rolling boil. Select the size of pot according to how much rhubarb you’ll be blanching.

Prepare Iced-Water: While waiting for the water to boil, fill a large bowl or clean kitchen sink with iced-water.

Blanch: When water boils, add rhubarb either directly to water or place a strainer full in the pot. Remove after one minute. **

Bathe in Iced-Water: Immediately submerge the rhubarb in a bath of iced-water after removing from the boiling water. Leave in water until cool to the touch. This shouldn’t take more than a few minutes. An ice bath is needed to stop the cooking process.

Step 4: Freezing


There are two ways to freeze rhubarb or any other fruits and vegetables: dry pack or tray pack.

Dry Pack: To dry pack, simply blot away excess moisture from rhubarb and place in air tight freezer bags or containers. Always leave a half inch of head space between the rhubarb and top of the container. Label and freeze.

This method freezes rhubarb as one block. If using this method, add precise measurements to your baggies such as 1 to 2 cups and label.

Tray Pack: Again, blot away excess moisture and place rhubarb on a cookie sheet. Separate the pieces so they are not touching and pop into the freezer until firm. Once firm, empty tray into freezer bags or container.

I prefer to use the tray pack method when freezing rhubarb because each piece freezes individually. I can shake out the amount I need and pop the rest back into the freezer.

When you blanch rhubarb before you freeze it, you’re helping to retain its flavor, nutrients, color and texture. What are some of your favorite ways to enjoy rhubarb?

* I follow the oatmeal raisin cookie recipe on the inside of the Quaker Oats canister and substitute diced rhubarb for raisins.

** If I’m going to blanch several batches of rhubarb I strain it into an empty bowl after blanching and save the hot water. When I’m ready for the next batch I return the water to the pot and start the process all over again.